
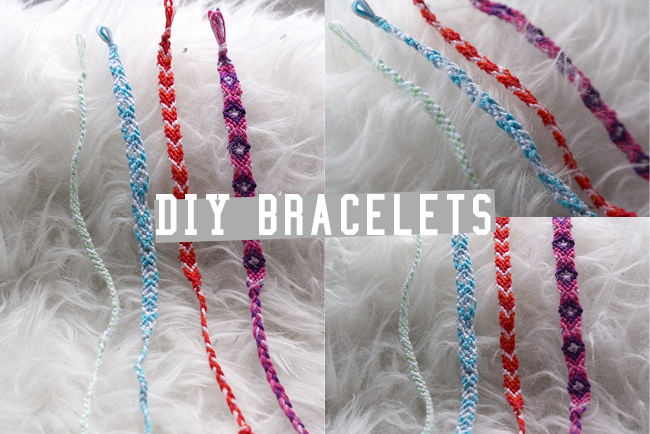
I remember making these when I was a kid. And I still love making them.
They are super simple to make and I think they are a great summer accessory.
Since they aren't that hard to make and they are a lot cheaper if you make them yourself then buying them in store. I've put together a DIY for you guys.
I'll be showing you guys how to make a chevron patterned one, like the red one above.
You can totally customize these even more, you can put studs on them or pearls. Or you can attach a chain on the side.
But for this DIY, I'm sticking to the simple chevron pattern.

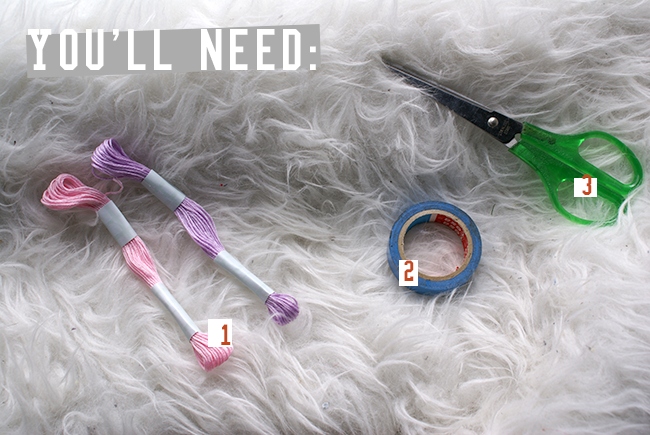
All you really need to make these bracelets is some embroidery thread, tape to hold down you bracelet (or a safety pin) and a pair of scissors.
You can get embroidery thread in every color at craft stores (for my dutch readers, Action has packs of embroidery thread as well).
For this DIY I'll be using four colors and I'll use every color twice, to make a chevron pattern.
You can also make a chevron with three colors or more. You don't even need to use the same color left as right.
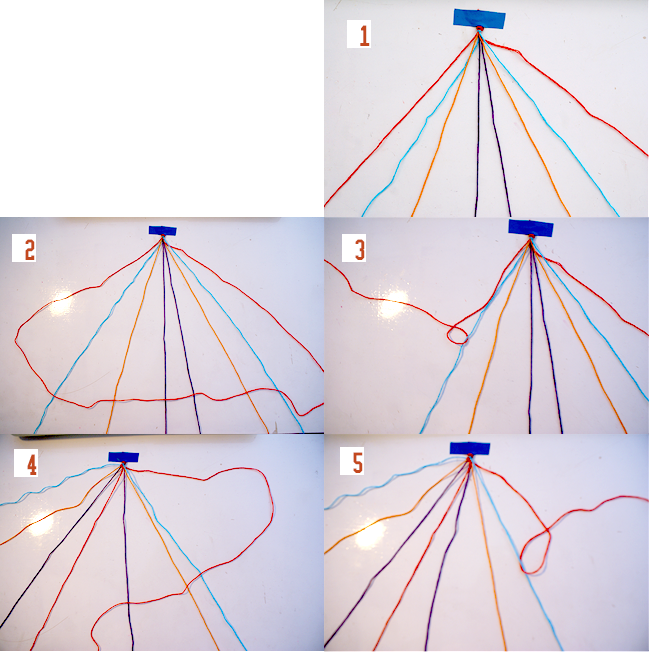
First of we start by measuring the amount of thread you need. For a bracelet I wrap the thread loosely around my wrist and take about four times that length. Now if you want to use the color on both side, you'll have to of course double that again. Do that for every color you want.
Next we lay out our threads in the order we want the pattern to be. So here the pattern will be red, blue, orange and purple.
(I tape mine down on my desk but you can also pin it on your jeans, or beach towel when you're making these on the beach, as long as you pin/tape the top down so you can make proper knots)
Then we can start making the knots. #2 show you how you make the first knot. You'll make this knot twice over every thread on the left side.
So two red knots over the blue thread, two red knots over the orange thread and two red knots over the purple thread.
Then we move to the right side. Here we do basically the same but instead of a left knot we make a right knot as in #4. Again remember to make two knots over every thread.
Once the two red threads are next two each other you just make two left knots with them.
Now you'll basically do the same with the blue thread on the left and the blue thread on the right.
And then the same every time with the outside thread going inwards.
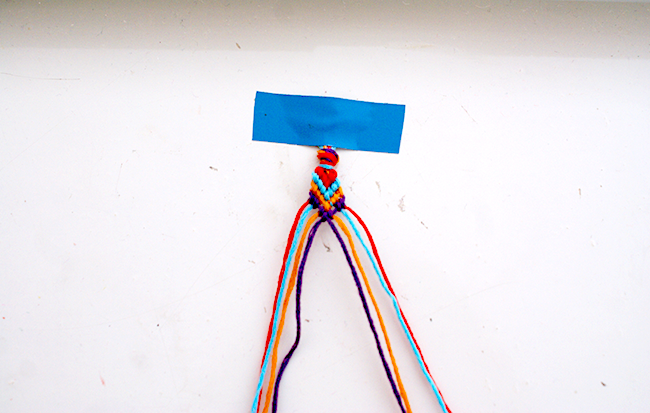
Here I've completed the knots with every color once. Now you just continue until the bracelet is long enough. Then you just make a big knot with all the threads and braid the loose ends together.
And you've made you own friendship bracelet!
I hope I've made this DIY clear enough, if you have any questions, don't be afraid to ask and I'll try and help.


No comments:
Post a Comment
Thanks for all the comments